

Table of Contents
- Step 1: Assess the Rust Before You Touch Anything
- Step 2: Gather What You Need to Remove Rust Safely
- What You'll Need
- Step 3: Remove Rust from Flat Faces, Edges and Markings
- Choosing the Best Rust Remover for Precision Tools
- How to Prevent Rust on Woodworking Tools in Storage and Transit
- Common Mistakes to Avoid
- Conclusion
- Frequently Asked Questions
Last Updated: 10 September 2026
Step 1: Assess the Rust Before You Touch Anything
Rust on a steel rule or combination square is rarely just a surface problem. Before you reach for an abrasive, work out what you are dealing with, because the right method for light surface bloom is the wrong method for deep pitting.
Start by identifying the rust type:
- Surface rust: an orange film that wipes away and leaves the metal underneath intact. This is the common case on tools stored in a damp van or unheated workshop.
- Pitting: dark, cratered spots where corrosion has eaten into the steel. The metal is gone; you can only stop it spreading and smooth the edges.
- Tight rust: corrosion in a joint, hinge or threaded adjuster where parts have seized. Forcing these is how you snap a blade.
Check the graduations and any etched markings at the same time. If rust has already lifted the engraving, no cleaning method will bring it back, and aggressive abrasion will make it worse.
Step 2: Gather What You Need to Remove Rust Safely
The right kit depends on severity, not on brand. Assemble everything before you start so you are not leaving a wet, acidic tool sitting on the bench while you hunt for a cloth.
Total Time: 20-40 minutes per tool Difficulty: Beginner to intermediate
What You'll Need
- Soft rags or microfibre cloths (several)
- Fine abrasive pads or paper in graduated grits
- A rust-dissolving solution or a mild acid such as white vinegar
- Cotton buds or a small stiff brush for tight corners
- A thin machine oil or dedicated protective coating
- Nitrile gloves and eye protection
- A shallow tray for soaking small parts
Cleaning Agents That Won't Attack Steel
The safest starting point is a mild acid soak. White vinegar dissolves surface rust over a few hours without touching sound steel underneath, which matters enormously on a hardened blade or a ground edge where you cannot afford to lose material (PubMed).
For heavier corrosion, a purpose-made rust remover, usually a chelating or phosphoric-acid-based solution, works faster. Read the label: some formulations leave a phosphate coating that resists re-rusting, which is beneficial in humid environments, while others leave bare steel that will flash-rust within hours if you do not oil it immediately.
Avoid anything containing caustic soda or strong chloride-based cleaners. These attack the steel itself and will etch a mirror-polished face.
Abrasives and Applicators by Rust Severity
Match the abrasive to the damage, and always work from the least aggressive option upward.
| Rust Severity | First Choice | Applicator | What to Avoid |
|---|---|---|---|
| Light surface film | Vinegar soak, then cloth | Microfibre rag | Coarse paper, wire brushes |
| Moderate, patchy rust | Fine abrasive pad | Cotton bud for corners | Power sanding |
| Heavy or pitted | Rust remover, then 400-grit | Small stiff brush | Files, scrapers, grinding discs |
| Rust in a joint | Penetrating oil, repeated | Fine brush and cloth | Hammering, prying apart |
Step 3: Remove Rust from Flat Faces, Edges and Markings
Work the flat face first, along the length of the tool, not across it. A combination square blade, a rule or a marking gauge face all carry their accuracy in that flatness, and scrubbing sideways with a pad can round an edge or blur a graduation.
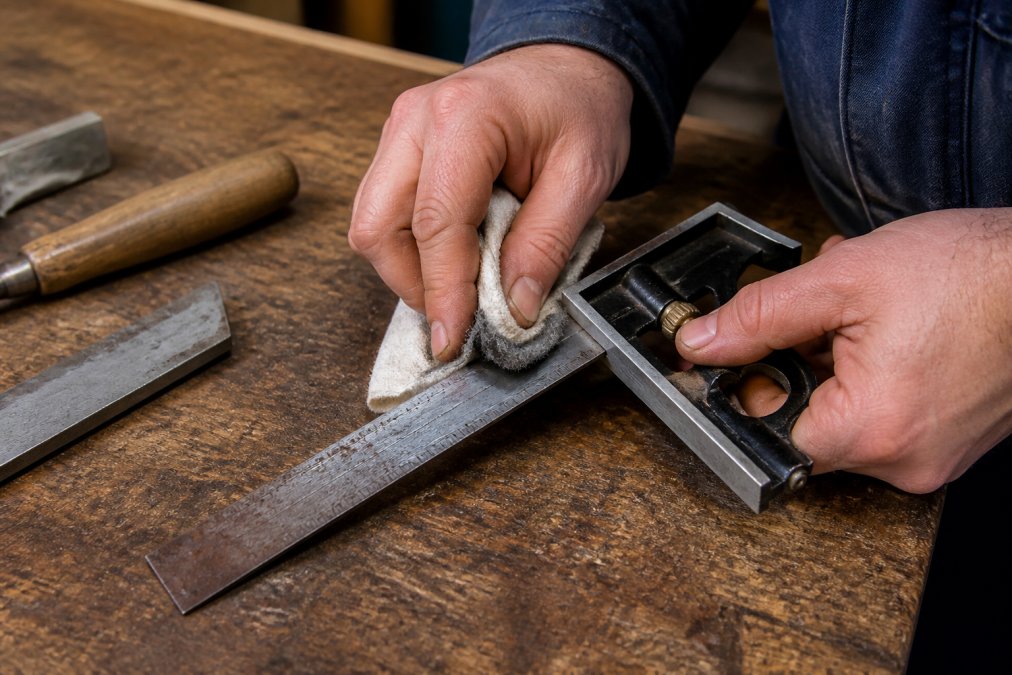
For light rust, soak the tool in vinegar for a few hours, then wipe along the grain of the steel with a cloth. For stubborn patches, use a fine abrasive pad with a drop of oil as a lubricant, working in short strokes in one direction.
Edges need a lighter touch than faces. A ground edge or a bevelled blade loses its geometry quickly under abrasion, so use a cotton bud or a folded cloth rather than a pad.
Markings and graduations are the most fragile part of any precision tool. Clean them with a soft cloth and solvent only. If rust has settled into the engraved lines, a wooden toothpick dipped in rust remover reaches into the groove without widening it.
What to Do About Pitted Surfaces
Pitting cannot be reversed. The steel has corroded away, and grinding the surface flat to remove the pits will change the tool's dimensions and ruin its accuracy.
Your realistic goal is three things: stop the corrosion, remove any loose material, and protect what remains. Clean the pits with a rust remover, dry the surface thoroughly, then apply a protective oil or wax.
If the pitting sits on a measuring face, the tool is no longer reliable for precision work. Retire it to rough jobs and replace it. A pitted square that reads a fraction out will cost you far more in rework than a new one costs to buy.
Choosing the Best Rust Remover for Precision Tools
The best rust remover for precision tools is one that dissolves corrosion without removing sound steel, and that leaves a surface you can protect immediately. For most workshop situations, that means a mild acid soak for light rust and a chelating or phosphoric-acid solution for heavier cases.
Here is how the common options compare in practice:
- White vinegar: cheap, gentle, slow. Ideal for surface rust on blades and rules. Leaves bare steel that must be oiled straight away.
- Phosphoric-acid removers: fast and thorough. Leave a phosphate layer that resists re-rusting, which suits tools used in damp conditions.
- Chelating removers: non-acidic and safe on most finishes. Slower, but very kind to polished faces and fine markings.
- Electrolysis: effective on heavy rust and complex shapes, but overkill for a hand tool and needs a power supply and sacrificial anode.
Whatever you choose, the finish matters as much as the remover. A tool cleaned and left bare will rust again within days in a cold workshop. Dry it, warm it slightly, and coat it.
How to Prevent Rust on Woodworking Tools in Storage and Transit
Rust returns wherever moisture meets bare steel, so prevention is a storage problem before it is a product problem. A van that swings between cold nights and warm days will condense water onto every tool inside it.
Practical steps that hold up on site:
- Oil or wax after every use. A thin film of machine oil or a paste wax takes seconds and stops surface rust forming.
- Control moisture in storage. Silica gel packs in a sealed toolbox or cabinet absorb the condensation that drives rust.
- Keep tools off cold floors. A steel rule left on a concrete floor overnight will rust faster than one hung on a wall.
- Dry before storing. Wipe tools down after working in damp conditions, and never put a wet tool back in its case.
- Use vapour-phase protection. A corrosion-inhibiting liner in a drawer or toolbox releases a protective vapour that reaches every surface.
For tools that travel, a hard case with a moisture-absorbing insert beats a canvas bag every time. And check your kit weekly in winter; catching a bloom of surface rust early turns a ten-minute soak into a thirty-second wipe.
Common Mistakes to Avoid
Most ruined precision tools are not victims of rust. They are victims of the wrong response to it.
- Using coarse abrasives first. Starting with heavy grit removes sound steel and rounds edges. Always start gentle.
- Leaving tools wet after cleaning. A rinsed tool left to air-dry will flash-rust within hours. Dry and oil immediately.
- Soaking the whole tool. Acids attack springs, plated parts and wooden handles. Soak only the rusted component where you can.
- Forcing seized joints. Penetrating oil and patience free a joint; force snaps it.
- Ignoring pitting on measuring faces. A pitted square or rule is out of tolerance. Replace it rather than trusting a bad reading.
Conclusion
Rust on precision tools is a maintenance problem, not a death sentence, provided you catch it early and treat it with the right method rather than the most aggressive one. Assess first, match your remover and abrasive to the severity, and always finish with a protective coat.
DeFrixo builds precision installation tools for exactly this kind of daily site work, and our kit is designed to be wiped down and put away without fuss. Every tool is made in the United Kingdom, dispatched fast, and backed by 30-day returns. Shop Laser Level Markers and keep your alignment kit reading true.
Frequently Asked Questions
What is the safest way to remove rust from precision measuring tools?
Start with the mildest method and escalate only if needed. Soak the tool in white vinegar or a chelated rust remover for 30 to 60 minutes, then scrub with a fine abrasive pad or 0000-grade wire wool. Never use coarse grinding discs or aggressive acids on measuring faces, because they remove metal and throw the tool out of tolerance. Dry thoroughly, then apply a thin film of oil or a rust inhibitor immediately after, since bare steel flash-rusts within hours in a damp workshop.
Will vinegar damage precision hand tools?
Vinegar removes rust safely if you control the soak time. Left for days, acetic acid will pit steel and dull a cutting edge, so limit immersion to roughly 30 to 60 minutes and check progress every 10 minutes. Remove the tool, rinse with water, dry it completely and oil it straight away. Vinegar is a good first choice for light surface rust on squares, rules and marking gauges, but for heavier corrosion use a chelated rust remover instead, which stops working once the rust is gone.
How do I prevent rust on woodworking tools in a workshop?
Control moisture first. Keep relative humidity below 50 per cent with ventilation or a dehumidifier, and store tools in a closed cabinet or case rather than open on a bench. Wipe every steel surface with a rust-inhibiting oil or a dry-film protectant after use, and add silica gel sachets or a vapour-phase inhibitor chip to drawers and toolboxes. Never put a tool away damp or with sawdust clinging to it, and bring cold tools up to room temperature before opening the case to stop condensation forming.
Can I use wire brushes on precision tool surfaces?
Only a fine brass or 0000-grade wire wool, and only on non-critical faces. A stiff steel wire brush scratches ground surfaces, rounds edges and blurs engraved graduations, which is exactly what you cannot afford on a square, rule or marking gauge. Use brass brushes on cast iron and heavily rusted bodies, and keep wire wool away from measuring faces entirely. For those, use chemical removal followed by a fine abrasive pad worked in one direction.