

Table of Contents
- What Makes an Alignment Tool Durable Enough for Daily Site Work
- Quick Comparison: Durable Woodworking Alignment Tools for Pros
- CabinetMate Assembly Jigs: Holding Panels at 90 Degrees
- How to Align Drawer Fronts Consistently on Every Run
- Using Laser Level Markers for Joinery and Cabinet Levelling
- Drilling Jigs for Handles and Shelf Pins: Repeatable Hole Placement
- Conclusion
- Frequently Asked Questions
Last Updated: September 18, 2026
What Makes an Alignment Tool Durable Enough for Daily Site Work
Durable woodworking alignment tools for pros are judged on three things: material stability, repeatability of reference, and how they survive a van floor. At DeFrixo, we build precision installation tools for kitchen fitting and cabinet work.
The working life of an alignment tool is a simple equation. A jig that holds a true 90° angle on day one but flexes under clamping pressure is not durable, however thick it looks. What matters is whether the reference surface stays where it started.
So when you assess any alignment tool, ignore the marketing. Check these instead:
- Reference stability. Does the tool hold the same angle or height after repeated use, or does it deform under load?
- Contact area. Four-point support resists twisting far better than a single edge.
- Material behaviour. A weighted base stays put; a light one shifts when you brush past it.
- Edge condition. Rounded corners protect finished surfaces. Sharp ones mark them.
- Storage and transport. Tools that live loose in a van get damaged. Compact tools survive.
This guide from DeFrixo covers six picks across cabinet assembly, drawer front alignment, laser levelling, and drilling. Below, we'll show you exactly how each one fits into a real installation sequence, and where each one stops.

Quick Comparison: Durable Woodworking Alignment Tools for Pros
The table below summarises the six tools covered, what each one does, and the job it suits best.
Tool |
Job It Solves |
Key Spec |
Best For |
|---|---|---|---|
CabinetMate Assembly Jigs (4-piece) |
Holds panels at 90° during assembly |
Fits 18mm boards, screw guides |
Squaring base and wall boxes |
CabinetMate T-Jigs (2-piece) |
Aligns middle shelves and dividers |
Heavy-duty T profile |
Internal partitions and T-joints |
Drawer Front Spacer Gauges |
Sets consistent gaps between fronts |
2mm, 3mm, 4mm gauges |
Drawer runs and built-ins |
AlignPro Laser Level Markers |
Gives repeatable reference points for a line laser |
Magnetic or heavy base versions |
Cabinet and worktop levelling |
Handle Drilling Jig |
Repeats handle hole positions |
5mm bushings, centres up to 192mm |
Doors and drawer fronts |
Shelf Pin Drilling Jig |
Repeats shelf pin holes |
32mm system, 5mm pins |
Wardrobes and adjustable shelving |
Two things stand out. First, none of these tools replaces your own judgement or your final check. Second, the ones that last are the ones with a fixed reference, not an adjustable one that drifts.

CabinetMate Assembly Jigs: Holding Panels at 90 Degrees
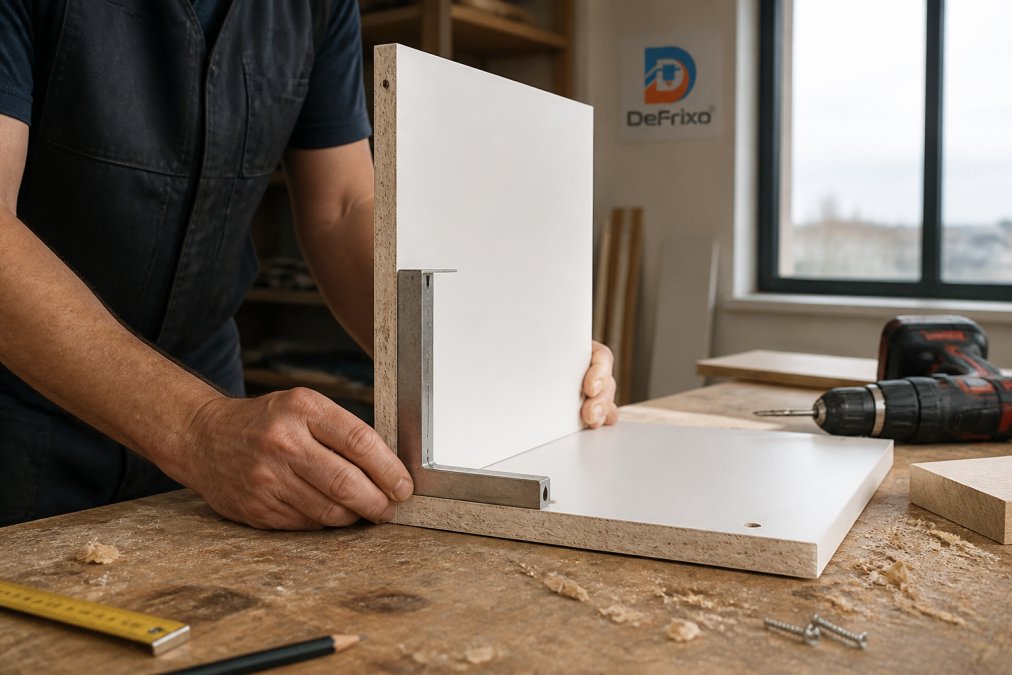
CabinetMate helps position and hold cabinet panels at 90 degrees during assembly. It stabilises panels while they are being joined and includes screw guide functionality, so you can fix boards without them shifting as the screw bites.

The four-piece set is designed for standard 18mm boards. Each jig gives you corner positioning with integrated screw guides and four-point stability. In practice, this means you can set a base or wall box, check the corner, and drive the fixing without a second pair of hands holding the panel.
A jig that holds two faces at once can help with this challenge.
CabinetMate holds panels at 90° while you work, but you still verify the finished assembly. Treat it as a second pair of hands, not a substitute for checking diagonals.
T-Jigs for Middle Shelves and Internal Dividers
The T-Jig set handles the joints a corner jig cannot reach. Where CabinetMate squares an outside corner, the T-Jig holds panels in a perfect T-joint, which is what you need for middle shelves, internal dividers, and structural partitions.
The set includes two large, heavy-duty T-Jigs. They give a stable reference that keeps boards square and properly aligned while you fix them in place. Setup is quick, and there is nothing to adjust, which is the point: fewer adjustments means fewer chances to introduce an error.
If you are building standard boxes only, the four-piece corner set covers you. Add the T-Jigs when your work includes centre partitions or shelving. The six-piece bundle combines both if you want one kit for multi-angle construction.
How to Align Drawer Fronts Consistently on Every Run
Consistent drawer front alignment comes down to one thing: fixing the gap before you fix the front. The Drawer Front Spacer Gauge Set gives you physical spacing references at 2mm, 3mm, and 4mm, sized for drawer fronts on 18mm panels.
CabinetMate™ Cabinet Assembly Jigs →
The method is straightforward:
- Fit the drawer box and confirm it runs cleanly.
- Slot the chosen gauge between the front edge and the reference above or below it.
- Hold the front against the gauge and fix it in position.
- Move along the run, using the same gauge at every gap.
- Check the finished run by eye and by measurement before you walk away.
The gauge set includes six spacers across the three sizes. Rounded corners help prevent surface marks on finished fronts, which matters when you are working with a lacquered or foil finish that shows every scuff.
Pick 2mm, 3mm, or 4mm at the start of the run and hold it. Mixing gaps across a bank of drawers can lead to an inconsistent finish.
Using Laser Level Markers for Joinery and Cabinet Levelling
Laser level markers give you visible, repeatable reference points at several cabinet positions at once. They do not create or hold the laser line. A separate line laser produces the beam, and the markers give it a consistent target to land on.
Here is the workflow. Place markers at the cabinet corners or other positions you need to compare. Position the line laser so the beam crosses one reference line on the first marker. Without moving the laser, adjust each cabinet corner until the beam crosses the same reference line on every marker. This provides visible references at both the front and rear of the cabinets.
Magnetic, Heavy Base and TallBoy Versions Compared
DeFrixo offers different versions for different working environments, and the differences are practical rather than cosmetic.
Version |
Base Type |
Reference Heights |
Best For |
|---|---|---|---|
Magnetic |
Magnetic core in base |
Standard |
Metal brackets, frames or screws |
Heavy Base |
10g metal core |
Standard |
General site work where stability matters |
TallBoy |
Heavy base as standard |
120mm, 130mm, 140mm |
Floor levelling where the beam sits high |
Drilling Jigs for Handles and Shelf Pins: Repeatable Hole Placement
Repeatable hole placement is the whole game with drilling jigs. Two DeFrixo tools cover the two most common jobs on a kitchen or wardrobe run.
The DeFrixo Cabinet & Drawer Handle Drilling Jig uses 5mm guide bushings and supports handle centres up to 192mm, helping installers repeat the same drilling positions across multiple doors and drawer fronts. The Adjustable Shelf Pin Drilling Jig uses the 32mm cabinet system, with seven drilling guides and indexing pins that allow the hole pattern to be extended along cabinet panels. Both tools reduce repeated measuring and help maintain consistent hole positioning.
Conclusion
The hard part of cabinet and joinery work is holding a reference steady across a run of units while your hands are full and the clock is running. That is the problem durable alignment tools solve, and it is why they earn their place in the van rather than sitting in it.
Frequently Asked Questions
What are the most durable alignment tools for professional cabinet fitting?
The tools that hold up to daily site work are the ones built around a single repeatable job. CabinetMate assembly jigs hold panels at 90 degrees with integrated screw guides. Drawer front spacer gauges give you fixed 2mm, 3mm or 4mm gaps. AlignPro laser level markers give a visible reference point at every cabinet corner, and the drilling jigs repeat handle and shelf pin positions across multiple fronts. Choose tools made for repeated use rather than one-off jobs, and check they suit standard 18mm boards before buying.
How do professional joiners make sure cabinet panels are square?
Most check diagonals on the assembled box and adjust before final fixing. A jig that holds panels at 90 degrees while you drive screws removes much of that correction work, because the panel cannot shift while the fixing goes in. CabinetMate jigs include screw guides for exactly this reason. They help stabilise panels during assembly, but they do not replace your final squareness check, so measure the diagonals on the finished box as normal.
Why use a laser level marker instead of measuring by hand for kitchen fitting?
Measuring each cabinet corner by hand means repeating the same check several times, and the laser line can be hard to see at the rear of a unit. AlignPro markers sit at the corners and give a visible reference line at both front and rear. You set the line laser once, then adjust each corner until the beam crosses the same reference line on every marker. The markers do not produce the laser line themselves, and you still carry out your own final level check.
What tools help maintain consistent gaps when installing drawer fronts?
Drawer front spacer gauges are the simplest option. The DeFrixo set includes 2mm, 3mm and 4mm gauges sized for 18mm panels, with six spacers in the set. You slot a gauge between fronts, fix the front in position, then move to the next one. Because every gap uses the same physical spacer, the run stays even without measuring each gap individually. Decide on your gap size before you start and keep the same gauge for the whole run.
How can I improve efficiency when drilling cabinet handle holes?
Set the jig once and drill every front without marking out. The DeFrixo handle drilling jig has 5mm guide bushings, supports handle centres up to 192mm, and offers vertical offsets at 30, 50, 70, 90 or 110mm. Once the template is set to your handle centres, every door and drawer front gets the same hole position. Keep one door aside as a reference so you can confirm the setting before working through the full batch.