

Table of Contents
- Why a Kitchen Renovation Checklist Matters for Beginners
- Kitchen Renovation Planning Checklist: What to Sort Before You Start
- Kitchen Renovation Order of Work: The Sequence That Keeps You Sane
- Kitchen Renovation Tools for Beginners: What You Actually Need
- Kitchen Renovation Timeline: A Realistic Schedule for a Beginner
- Common Mistakes Beginners Make (and How to Avoid Them)
- Your Printable DIY Kitchen Renovation Checklist
- Conclusion
- Frequently Asked Questions
Last Updated: 17 October 2026
Why a Kitchen Renovation Checklist Matters for Beginners
A kitchen renovation checklist is a written list of every task, decision and purchase a kitchen project needs, arranged in the order you will actually tackle them. This guide from DeFrixo covers the full sequence, from planning to final snagging, so nothing gets missed halfway through.
Most first-time projects go wrong in the same way. Not through bad workmanship, but through poor sequencing.
People rip out units before the new ones arrive. They tile before the plumbing is signed off. They buy worktops before the base units are level. Each of those mistakes costs money and days.
A checklist fixes that. It turns a sprawling, stressful job into a series of small, finishable steps.
Below, we will show you exactly how to plan, sequence and run a kitchen renovation without losing your sanity. The order of work we cover is the same one professional fitters follow on site.
Kitchen Renovation Planning Checklist: What to Sort Before You Start
The planning phase decides whether the build runs smoothly or grinds to a halt. Get these items sorted before you touch a single unit.
Decisions to lock in first:
- Final layout, including appliance positions
- Unit sizes and door styles
- Worktop material and thickness
- Sink, tap and appliance models
- Flooring type and whether it goes under the units
- Lighting plan, including any new circuits
Practical checks:
- Measure the room at three points on every wall. Walls are rarely square.
- Confirm where the stopcock, consumer unit and gas isolation valve are.
- Check delivery lead times before booking any trades.
- Confirm whether you need building regulations approval for any structural work (Building regulations approval: When you need approval). Your local authority can advise.
A common mistake is ordering units before the walls are checked. Out-of-square walls change the filler panels and end panels you need.
Kitchen Renovation Order of Work: The Sequence That Keeps You Sane
The correct kitchen renovation order of work runs from the dirtiest jobs to the cleanest. Strip out first, then first fix, then units, then worktops, then second fix, then finishing.
Here is the sequence that works:
- Strip out old units, worktops and appliances
- Remove old flooring and wall coverings
- First fix: plumbing, electrics and any structural work
- Plaster and make good the walls
- Fit the flooring at the appropriate stage according to the flooring manufacturer’s instructions. Some floors can run beneath cabinets, while floating floors may need to be fitted around fixed units.
- Assemble and fit base units
- Fit wall units
- Template and fit worktops
- Fit sink, tap and appliances
- Second fix: sockets, switches and lighting
- Tile or splashback
- Fit doors, drawers, handles and plinths
- Seal, snag and clean
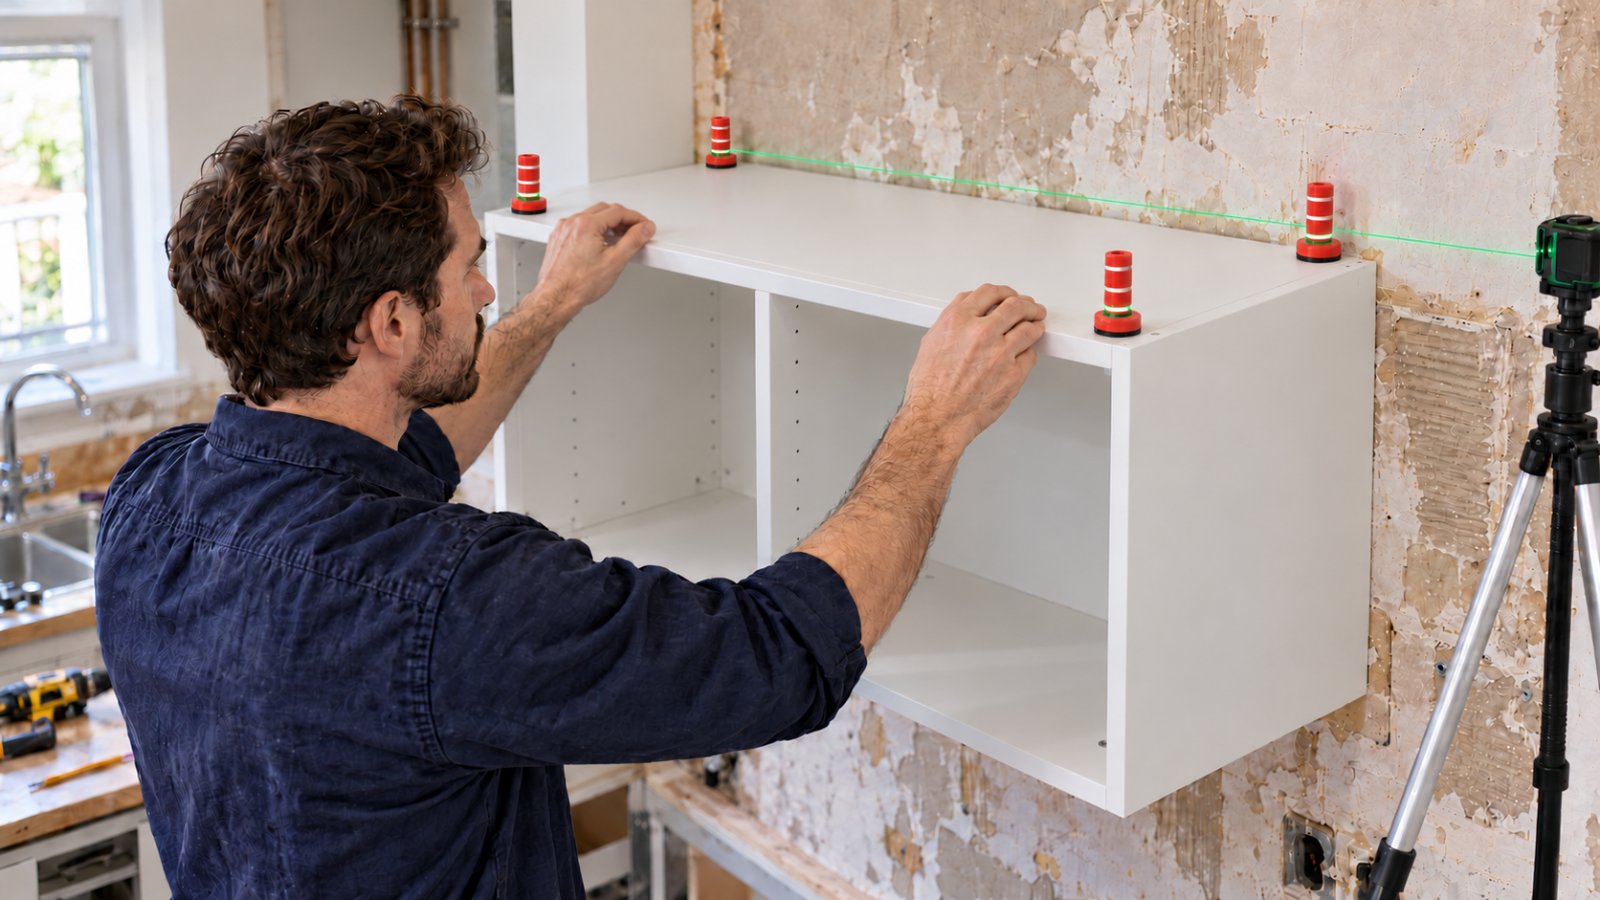
Level base units are the hinge point of the whole job. Everything after them depends on that being right.
This is where a repeatable reference helps. AlignPro Laser Level Markers give you fixed, visible reference points at several cabinet corners at once. You set your line laser to cross one reference line, leave it still, then adjust each cabinet foot until the laser crosses the same line on every marker. The markers do not produce the laser line and they do not replace your final level check. Their main purpose is to provide matching visible reference points across multiple cabinet corners so they can be brought onto the same level plane.
Kitchen Renovation Tools for Beginners: What You Actually Need
You do not need a van full of kit. You need a small set of reliable tools and a few that remove guesswork.
Core tools:
- Tape measure and pencil
- Spirit level, at least 600mm
- Cordless drill and driver
- Screwdriver set
- Claw hammer and pry bar
- Utility knife
- Adjustable spanner and pipe wrench
- Safety glasses, gloves and dust mask
Tools that make the difference:
- A line laser for setting consistent heights
- Assembly jigs to hold panels at 90 degrees
- Spacer gauges for even drawer front gaps
- A drilling jig for repeatable handle positions
Handle placement is a good example. Drilling each door by hand invites small variations that show up badly across a run. A Cabinet & Drawer Handle Drilling Jig lets you repeat the same drilling position across every door and drawer front, with 5mm guide bushings and handle centres up to 192mm.

Kitchen Renovation Timeline: A Realistic Schedule for a Beginner
A typical beginner kitchen renovation takes four to eight weeks, depending on how much structural work is involved. The build itself is often the shortest part.
AlignPro™ Lightweight Laser Level Markers – Cabinet & Worktop Installation Tool →
Phase |
Typical Duration |
What Happens |
|---|---|---|
Planning and ordering |
2-4 weeks |
Decisions, measurements, lead times |
Strip out |
1-2 days |
Remove old kitchen and flooring |
First fix |
2-5 days |
Plumbing, electrics, plastering |
Unit installation |
2-3 days |
Base units, wall units, levelling |
Worktops |
1-2 weeks |
Template, fabrication, fitting |
Second fix and finishing |
3-5 days |
Appliances, tiling, handles, sealing |
Worktop templating is the usual bottleneck. Stone and solid surface tops are measured after the units are fitted, then fabricated off site. Build that wait into your plan.
Add a buffer. Something always arrives late or wrong.
Common Mistakes Beginners Make (and How to Avoid Them)
The same handful of errors sink beginner kitchen projects. Each one is avoidable with a little planning.
- Fitting units before the floor. Decide early whether flooring runs under the units, then stick to it.
- Skipping the wall check. Out-of-square walls need packers and fillers. Find out before delivery day.
- Rushing the levelling. Every later stage inherits the error. Take the time here.
- Drilling handles by eye. Small variations are obvious across a run of doors. Use a jig.
- Forgetting services. Photograph pipe and cable runs before the walls are closed up.
- No snag list. Walk the room with a notepad at the end and write down every small defect.
CabinetMate Cabinet Assembly Jigs help hold panels at 90 degrees while you join them, with integrated screw guides to reduce movement during fixing. They support the assembly. They do not replace checking the finished carcass.

Drawer Front Spacer Gauges do a similar job for gaps. The set includes 2mm, 3mm and 4mm gauges for 18mm panels, so you can hold a consistent reveal without measuring each gap separately.
Your Printable DIY Kitchen Renovation Checklist
Print this and tick it off as you go. It is the short version of everything above.
Before you start
- Final layout drawn and signed off
- Units, worktop and appliances ordered
- Delivery dates confirmed
- Trades booked
- Building regulations advice taken where needed
- Temporary kitchen set up
Strip out and first fix
- Old units and worktops removed
- Old flooring lifted
- Electrics and plumbing first fixed
- Walls plastered and made good
- Pipe and cable runs photographed
Installation
- Flooring fitted
- Base units assembled and levelled
- Wall units fitted
- Worktop templated and fitted
- Sink, tap and appliances connected
Finishing
- Sockets, switches and lighting fitted
- Splashback tiled
- Doors, drawers and handles fitted
- Plinths and end panels fitted
- Silicone applied
- Snag list written and cleared
Conclusion
A kitchen renovation rewards patience at the start and punishes shortcuts later. The checklist above gives you a sequence you can trust, and the tools you choose decide how repeatable that sequence is.
At DeFrixo, we make precision installation tools for exactly this kind of work. AlignPro Laser Level Markers give you matching visible reference points across cabinet corners. CabinetMate jigs hold panels steady at 90 degrees while you fix them. Handle drilling jigs and spacer gauges take the guesswork out of the finishing stages.
Get started with DeFrixo and fit your kitchen with the same repeatable accuracy professionals rely on.
Frequently Asked Questions
What should I do first when renovating a kitchen?
Start with the planning checklist: measure the room, decide the layout, confirm services, and set a budget. Before any demolition, isolate the water and power, arrange waste removal, and order materials so they arrive on time. The first physical job is stripping out the old kitchen, but only after you have a clear order of work written down. A written sequence prevents the classic beginner error of ripping out units before the new ones are on site.
Can a beginner renovate a kitchen themselves?
Yes, many fitting and finishing stages can be achievable for a competent DIYer, including assembling units, fitting cabinets, handles and drawer fronts. Some worktops, such as laminate or timber, may also be suitable for DIY installation, while stone and solid surface worktops usually require specialist templating and fitting. Leave gas work to an appropriately qualified Gas Safe registered engineer. Electrical and structural work must comply with the regulations that apply in your part of the UK, and approval or certification requirements vary. Use a competent electrician for electrical alterations and check with your local authority where structural work or a building warrant or other approval may be required. Plan your timeline around these professional visits so they do not hold up the rest of the job.
Which kitchen renovation tools for beginners are worth buying?
A tape measure, spirit level, drill, screwdriver set, and a line laser cover most of the work. For cabinet fitting, small aids make a real difference: laser level markers give matching visible reference points across cabinet corners, assembly jigs hold panels at 90 degrees, spacer gauges set consistent drawer gaps, and a handle drilling jig keeps hole positions identical across doors. Buy tools that suit your budget and the number of cabinets you are fitting.
How long does a kitchen renovation timeline usually take?
A typical DIY kitchen renovation takes three to six weeks from strip-out to final touches, depending on size and how much you do yourself. The planning checklist and material lead times often add a week or two before work starts. Build in buffer days for deliveries, electrician and plumber visits, and unexpected repairs. A realistic timeline beats an optimistic one, especially if you are fitting around work or family commitments.