

Table of Contents
- Why Cabinet Installation Precision Matters
- What Happens When Cabinets Are Not Installed Level
- The Impact of Uneven Cabinets on Worktops
- Essential Tools for Accurate Cabinet Fitting
- How AlignPro Laser Level Markers Actually Work
-
Common Cabinet Installation Mistakes and How to Avoid Them
- 1. Using the Floor as the Only Height Reference
- 2. Checking Only the Front of the Cabinet
- 3. Moving the Laser During the Levelling Process
- 4. Using Different Reference Lines on Different Markers
- 5. Assuming an Assembly Jig Removes the Need for Verification
- 6. Positioning Drawer Fronts by Eye
- 7. Measuring Every Handle Separately
- How Precision Affects Doors, Drawers and Handle Alignment
- Conclusion
- Frequently Asked Questions
Why Cabinet Installation Precision Matters
Kitchen cabinets may look like simple boxes, but installing a complete run accurately requires several points to remain level, square and correctly aligned at the same time.
Floors are rarely perfectly level. Walls may not be perfectly straight. Individual cabinet feet can require different amounts of adjustment. This means an installer needs a reliable reference rather than simply assuming that every cabinet will follow the first one.
Cabinet installation precision is about establishing a reference and using it consistently across the installation.
Getting the cabinet run correct at this stage makes later work easier, including worktop installation, door adjustment, drawer alignment and fitting end panels.
The goal is not to replace traditional fitting skills. The goal is to make accurate positioning easier to see, repeat and verify.
What Happens When Cabinets Are Not Installed Level
When cabinets are installed at different heights or become twisted during adjustment, problems can appear throughout the finished kitchen.
These may include:
- Doors that require excessive hinge adjustment.
- Drawer fronts that do not line up consistently.
- Uneven gaps between neighbouring cabinets.
- Worktops that do not sit evenly across the complete run.
- End panels and fillers that become harder to fit cleanly.
- Integrated appliances that do not sit correctly within the intended opening.
A common method is to level the first cabinet carefully and then use it as the reference for the next cabinet.
This can work, but on a longer run it means the installer is repeatedly transferring the reference from one cabinet to another.
A line laser provides a much better visual reference because the same horizontal plane can be visible across several cabinets at once.
The challenge is making that laser reference easy to see at every adjustment point.
That is where tools such as AlignPro Laser Level Markers become useful.
The Impact of Uneven Cabinets on Worktops
The quality of the cabinet installation directly affects the surface that will eventually sit on top of it.
A worktop needs a cabinet run that is correctly positioned and adequately supported.
If one cabinet corner is lower or higher than the others, the installer may need additional adjustment before the worktop can be fitted correctly.
The same problem can occur from front to rear.
A cabinet may appear level when viewed from the front while one of the rear corners is sitting at a different height.
This is especially important because checking the rear of a cabinet can be more awkward once several units are positioned together.
Using a line laser across multiple reference points makes it easier to identify these differences before the cabinets are finally fixed.
The objective is simple: bring the required cabinet support points onto the same level plane before moving on to the next stage of installation.

AlignPro™ Lightweight Laser Level Markers – Cabinet & Worktop Installation Tool
Essential Tools for Accurate Cabinet Fitting
Accurate cabinet fitting does not depend on one tool.
Different tools solve different alignment problems.
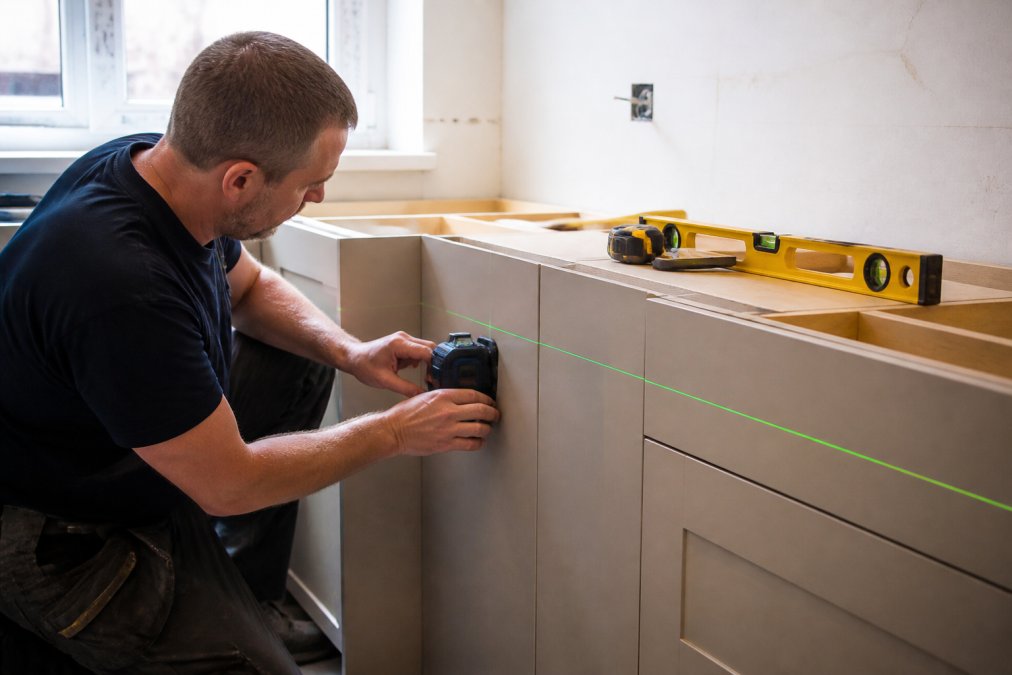
Line Laser
A line laser creates a continuous horizontal or vertical reference across the working area.
This allows an installer to compare multiple positions without repeatedly moving a spirit level from one cabinet to another.
The laser itself provides the line.
It does not, however, automatically show whether every individual cabinet corner is positioned at exactly the same height.
This is where reference markers can help.
AlignPro Laser Level Markers
AlignPro Laser Level Markers provide consistent physical reference points that can be positioned around the cabinet installation.
Each marker is made to a consistent height and includes fixed reference lines.
The installer uses those lines together with a line laser to compare several cabinet positions simultaneously.
The markers do not create the laser line.
They do not replace the laser level.
They provide clearly visible reference points for the laser.
CabinetMate Cabinet Assembly Jigs
CabinetMate Cabinet Assembly Jigs are designed to help hold 18mm cabinet panels at a 90 degree angle during assembly.
The four point support helps stabilise the panels while they are positioned and fastened.
Integrated screw guides help the installer secure the panels without them moving during fixing.
The jigs make accurate assembly easier, but good fitting practice still means checking the completed carcass where required.
Drawer Front Spacer Gauges
The Drawer Front Spacer Gauge Set is designed to help maintain consistent gaps while positioning drawer fronts.
The set provides 2mm, 3mm and 4mm spacing options for standard 18mm furniture panels.
Instead of repeatedly measuring a small gap by eye, the installer can position the appropriate gauges between components and use them as a physical spacing reference while the front is aligned and fixed.
Cabinet and Drawer Handle Drilling Jig
The Cabinet and Drawer Handle Drilling Jig provides repeatable drilling positions for cabinet doors and drawer fronts.
It uses integrated 5mm guide bushings and supports handle centres up to 192mm.
Once the jig is configured for the required handle position, the same setup can be repeated across several doors or drawer fronts.
This reduces repeated measuring and helps maintain consistent handle alignment across the installation.
How AlignPro Laser Level Markers Actually Work
The purpose of AlignPro Laser Level Markers is to give the installer several matching reference points around the cabinet.
This is particularly useful when levelling cabinets from both the front and rear.
Without markers, the laser may be clearly visible against the front edge of a cabinet but difficult to see at the rear adjustment point.
The cabinet itself can obstruct the laser reference.
AlignPro provides a visible reference at each selected position.
Basic Method
- Position the AlignPro markers at the cabinet corners or other points that need to be compared.
- Set up the line laser so the beam crosses one of the reference lines on the first marker.
- Leave the laser in that position.
- Check the remaining markers.
- Adjust the appropriate cabinet feet or corners until the laser crosses the same reference line on every marker.
- Continue checking the markers while the cabinets are adjusted and connected.
Because the markers are manufactured to consistent dimensions, the same reference line represents the same height at every position.
This allows the installer to see several cabinet adjustment points simultaneously.
For example, a marker can be positioned at the front left, front right, rear left and rear right of a cabinet.
Instead of checking only the front edge and then trying to determine what is happening behind the cabinet, the installer has visible laser references at all four positions.
Across a longer kitchen run, additional markers can provide more reference points.
The principle remains the same.
Set the laser against one chosen reference line, then bring the required points onto that same line.
This is what makes the system useful.
It converts a laser beam into a series of clear, repeatable reference points around the installation.
Why This Can Be Faster Than Using Cabinet Edges Alone
Using the cabinet itself as the laser reference can work at the front where the beam is easy to see.
At the rear, however, visibility can be much more difficult.
AlignPro gives the installer a raised and clearly defined reference point at both the front and rear.
There is no need to remember a measurement for each corner.
The installer simply checks whether the beam crosses the same reference line on every marker.
AlignPro is designed to assist the levelling process rather than replace normal final installation checks.
A final check with the installer's preferred level, straightedge or other verification method remains good practice before the installation is completed.

Common Cabinet Installation Mistakes and How to Avoid Them
Small errors at the beginning of an installation can create much more work later.
Here are several common problems.
1. Using the Floor as the Only Height Reference
Floors are not always level.
Taking the same measurement from the floor at several different points does not necessarily create a level cabinet run.
A line laser provides a consistent horizontal reference independent of variations in the floor.
2. Checking Only the Front of the Cabinet
The front may appear correct while a rear foot is too high or too low.
Checking both front and rear adjustment points helps prevent the cabinet from being twisted.
This is one of the situations where multiple AlignPro markers are especially useful.
3. Moving the Laser During the Levelling Process
Once the laser has been positioned against the chosen reference line, moving it changes the datum.
Keep the laser in the same position while comparing the markers.
4. Using Different Reference Lines on Different Markers
The system works by comparing the same line on every marker.
If the laser crosses one reference line on the first marker, adjust the remaining points until the laser crosses that same line on their markers.
5. Assuming an Assembly Jig Removes the Need for Verification
CabinetMate helps hold panels at 90 degrees during assembly and makes fixing easier.
It does not remove the need for sensible installation checks.
Panel dimensions, fixings and assembly quality still matter.
6. Positioning Drawer Fronts by Eye
Small differences between drawer gaps become more noticeable when several drawers are viewed together.
Physical spacer gauges make it easier to repeat the same spacing throughout the cabinet.
7. Measuring Every Handle Separately
Repeated measuring creates repeated opportunities for small differences.
A drilling jig allows the same configured position to be used across multiple doors and drawers.
How Precision Affects Doors, Drawers and Handle Alignment
Customers often notice the finishing details before anything else.
They see the gaps between doors.
They see whether drawer fronts line up.
They see whether handles form a straight row across several cabinets.
The quality of these details often begins with the cabinet carcasses.
If the cabinets are level and correctly positioned, adjusting doors and drawer fronts becomes easier.
Once the carcasses are correct, dedicated positioning tools can help with the finishing stages.

The Drawer Front Spacer Gauge Set provides consistent 2mm, 3mm or 4mm spacing references.
The Cabinet and Drawer Handle Drilling Jig provides repeatable drilling positions.
The CabinetMate Assembly Jigs help control 90 degree panel alignment during cabinet assembly.
And the AlignPro Laser Level Markers provide matching reference points for the line laser during cabinet levelling.
Each tool solves a different problem.
Together, they help make repeatable accuracy easier throughout the cabinet fitting process.
Conclusion
Precision cabinet installation is not about replacing experience with more tools.
It is about making important measurements and reference points easier to see and repeat.
A line laser gives the installer a consistent level plane.
AlignPro Laser Level Markers turn that plane into visible reference points at several cabinet corners simultaneously.
CabinetMate Assembly Jigs help hold panels at 90 degrees while cabinets are assembled.
Drawer Front Spacer Gauges help maintain consistent gaps.
The Cabinet and Drawer Handle Drilling Jig helps repeat the same handle position across multiple fronts.
Used correctly, these tools reduce repeated measuring and make it easier to maintain consistency throughout an installation.
Explore the complete range of DeFrixo cabinet fitting and woodworking tools, or view the AlignPro Laser Level Marker range.
Frequently Asked Questions
Why are Laser Level Markers useful at the rear of cabinets?
When using the cabinet edge itself as the reference, the laser may be easy to see at the front but difficult to see at the rear. Placing markers at both the front and rear provides visible reference points for the laser at each adjustment position. This makes it easier to adjust individual cabinet corners while viewing the same level reference.
How do CabinetMate Assembly Jigs work?
CabinetMate Assembly Jigs are designed for 18mm panels. They hold the panels at a 90 degree angle while the cabinet is positioned and fastened. Integrated screw guides help prevent movement during fixing.
What are drawer spacer gauges used for?
Drawer spacer gauges provide a physical reference for setting consistent gaps between drawer fronts and surrounding components. DeFrixo's set includes 2mm, 3mm and 4mm gauges for use with standard 18mm furniture panels.
What does a cabinet handle drilling jig do?
A cabinet handle drilling jig provides repeatable drilling positions for handles on doors and drawer fronts. The DeFrixo jig uses 5mm guide bushings and supports handle centres up to 192mm, allowing the same configured position to be repeated across multiple fronts.