

Table of Contents
- Quick Comparison: Best Tools for Kitchen Cabinet Installation
- How We Evaluated These Cabinet Installation Tools
- AlignPro Laser Level Markers: Repeatable Reference Points for Level Runs
- CabinetMate Assembly Jigs for Joiners: Holding Panels at 90 Degrees
- Drawer Front Spacer Gauges: Consistent Gaps Without Repeated Measuring
- Handle and Shelf Drilling Jigs: Repeatable Hole Placement
- Kitchen Cabinet Installation Best Practices: Getting the Workflow Right
- Conclusion
- Frequently Asked Questions
Last Updated: September 21, 2026
Quick Comparison: Best Tools for Kitchen Cabinet Installation
The best tools for kitchen cabinet installation are the ones that turn a one-off measurement into a repeatable reference you can trust across every unit on the run. This guide from DeFrixo breaks down the specialist kit that does exactly that, from line laser reference markers to assembly jigs and drilling templates.
Most installers already own a decent line laser, a good spirit level and a tape they trust. The problem is rarely the tools themselves. It is that one measurement gets taken, then re-taken, then nudged, then checked again at every cabinet corner. That repetition is where time disappears and where small errors creep in.
Below, we cover the six tool types that matter most for cabinet installation, what each one actually solves on site, and how to judge whether it earns a place in your van. Every recommendation here comes from DeFrixo's own range, built for the way cabinets actually go in.
Tool |
Best For |
Price From |
|---|---|---|
Matching cabinet corners to one level plane |
£16.95 |
|
CabinetMate Assembly Jigs |
Holding panels at 90° during assembly |
£24.95 |
Drawer Front Spacer Gauges |
Consistent 2/3/4mm gaps between fronts |
£17.99 |
Handle Drilling Jig |
Repeatable handle positions across fronts |
£22.99 |
Shelf Pin Drilling Jig |
32mm system shelf holes |
£21.99 |
How We Evaluated These Cabinet Installation Tools
Every tool here was judged on four things: whether it removes a repeated measurement, whether it produces the same result on the second unit as the first, whether it survives daily site use, and whether it solves a problem that actually shows up mid-install.

That last point matters more than spec sheets suggest. A tool that saves thirty seconds once is not worth carrying. A tool that removes the same two-minute faff on every cabinet corner is.
We also weighted how each tool fits alongside kit you already own. None of these replace your line laser, your level or your judgement. They sit underneath those tools and make them easier to use consistently. For broader guidance on safe working practices and tool handling on site, the Health and Safety Executive guidance for construction work is worth a read before you change how you work.
AlignPro Laser Level Markers: Repeatable Reference Points for Level Runs
AlignPro Laser Level Markers are fixed-height reference blocks that give your line laser a visible, repeatable point to cross at each cabinet corner. They do not produce the laser line themselves. A separate line laser does that.
The workflow is straightforward. Place markers at the corners you need to compare. Set the line laser so the beam crosses one reference line on the first marker. Leave the laser where it is. Then adjust each cabinet corner until the beam crosses the same reference line on every marker.
The real gain is visibility. If you use the cabinet edge itself as the reference, the laser can be easy to see at the front and near-impossible at the rear. Markers at the corners give you something clear to read at both ends, which makes adjusting individual feet far less fiddly.
DeFrixo offers three versions: Lightweight at £16.95, Heavy Base with a 10g metal core at £17.95, and Magnetic at £19.95 for attaching to metal brackets, frames or screws. Red markers contrast best with green beams; green markers contrast best with red beams.
These markers do not replace your line laser, and they do not replace your final level check. They make the adjustment stage faster and more consistent.
CabinetMate Assembly Jigs for Joiners: Holding Panels at 90 Degrees
CabinetMate helps position and hold cabinet panels at 90 degrees while you assemble them. It stabilises panels during joining and includes screw guide functionality so panels are less likely to shift as you fix them.

For joiners building boxes, the awkward part has always been the same: you need two hands to hold the panels, two hands to drive the screws, and somehow a third to keep everything square. CabinetMate gives you four-point support so the panels stay put while you work.
The 90° jig set is designed for standard 18mm boards and comes as a set of four at £24.95. For middle shelves, internal dividers and T-joints, the T-Jig set of two is £21.95. If you are doing full kitchen runs, the six-piece bundle at £44.95 combines both.
What CabinetMate does not do is guarantee a perfectly square finished cabinet. It holds panels accurately while you fasten them. You still verify the assembly, as you would with any jig.
Drawer Front Spacer Gauges: Consistent Gaps Without Repeated Measuring
Drawer Front Spacer Gauges are physical spacing references that sit between drawer fronts while you position and fix them. They let you create consistent gaps without measuring each gap individually.
AlignPro™ Lightweight Laser Level →

Anyone who has fitted a bank of drawers knows the frustration. You set the first gap, then the second, then discover the third is a millimetre out and the run looks wrong. The gauges remove that by giving you a fixed reference you place and remove.
DeFrixo's set covers 2mm, 3mm and 4mm gaps, sized for standard 18mm panels, and includes six gauges at £17.99. Rounded corners help prevent surface marks on finished fronts.
Handle and Shelf Drilling Jigs: Repeatable Hole Placement
Handle drilling jigs help you repeat the same drilling position across cabinet doors and drawer fronts. They cut out the repeated measuring and marking that eats time on a run of twenty doors.
DeFrixo's adjustable handle jig uses integrated 5mm guide bushings so you can drill directly through the template without pre-marking. It supports handle centres up to 192mm and offers vertical positioning at 30, 50, 70, 90 or 110mm. It costs £22.99.
For shelf pins, the adjustable 32mm system jig delivers repeatable hole placement with aluminium bushings and indexing pins, so you can extend a hole pattern across a full cabinet height without recalculating. It is reversible for left and right sides and costs £21.99.
Both jigs reduce measurement steps. Neither removes the need to check your first panel before committing to the rest of the run.
Kitchen Cabinet Installation Best Practices: Getting the Workflow Right
Kitchen cabinet installation best practices come down to one principle: fix your references before you fix your cabinets. Decide where level is, decide where your gaps are, then bring every unit to those references rather than adjusting each one in isolation.
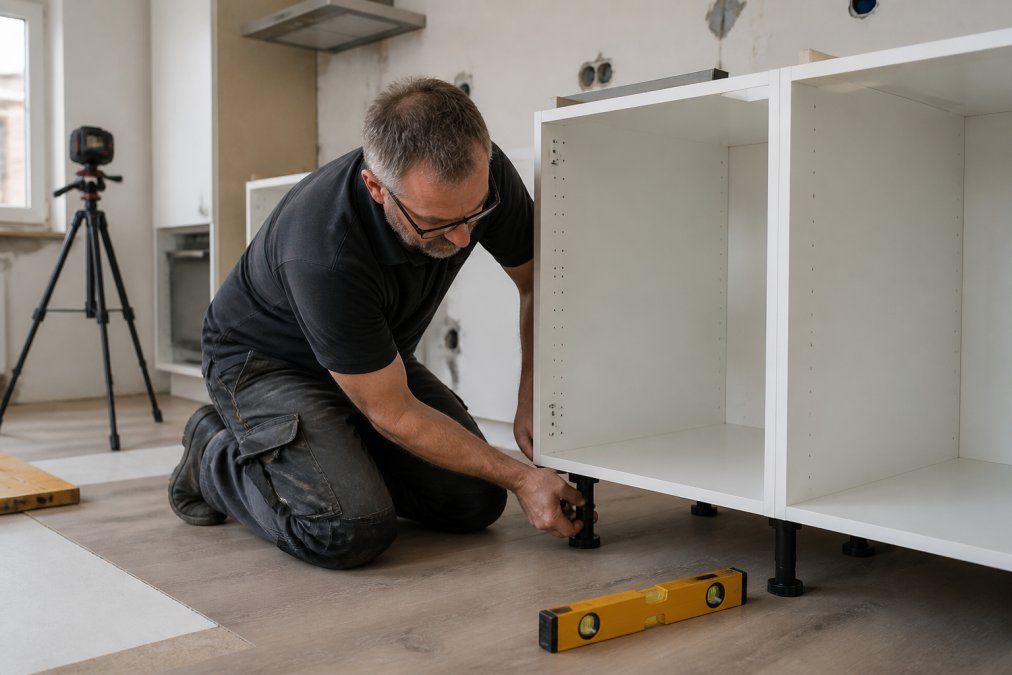
A workflow that holds up on site:
- Set your level reference first and leave the laser untouched for the whole run.
- Place reference markers at every corner you need to compare.
- Bring each corner onto the same reference line before moving to the next unit.
- Assemble boxes with jigs holding panels at 90 degrees, then verify.
- Fit drawer fronts using spacer gauges, checking the first one carefully.
- Drill handles and shelf pins with jigs, checking the first panel before the rest.
The common mistake is relying only on the previously fitted cabinet instead of checking each unit against the same fixed datum.
Conclusion
The hardest part of cabinet installation is not the fitting itself. It is keeping every unit on the same reference without re-measuring the same thing twenty times.
Frequently Asked Questions
What tools do I need to install kitchen cabinets myself?
A line laser, a spirit level, a tape measure and a drill form the core kit. For repeatable accuracy, add laser level markers for cabinet installation, which give you visible reference points at each cabinet corner so you can compare positions without moving the laser. Assembly jigs help hold panels at 90 degrees, spacer gauges keep drawer gaps consistent, and a drilling jig maintains handle positions across multiple fronts. Start with the tools that address your most frequent rework.
How do you ensure kitchen cabinets are perfectly level?
Set your line laser at a convenient height and place markers at each cabinet corner. Position the laser so it crosses one reference line on the first marker, then adjust each cabinet foot until the laser crosses the same line on every marker. This gives you visible reference points at both front and rear. Always finish with a spirit level check across the full run, as markers complement your existing verification rather than replacing it.
What is the best way to align drawer fronts during installation?
Use physical spacer gauges to set consistent gaps between fronts. A gauge set with 2mm, 3mm and 4mm options lets you match the reveal across the entire run without measuring each gap individually. Position the gauge, fix the front, then move to the next drawer. This approach reduces fine-tuning and helps you achieve an even, professional finish across multiple drawers.
Do I need a laser level for kitchen cabinet fitting?
A line laser makes it easier to establish a consistent height reference across a wall of cabinets, especially over long runs where a spirit level becomes impractical. Laser level markers work alongside the laser to provide visible reference points at each cabinet position. If you fit cabinets regularly, the combination reduces repeated measuring and helps you bring every unit onto the same level plane more efficiently.
How can I improve efficiency when installing multiple kitchen cabinets?
Set up repeatable references before you start. Position your laser once, place markers at each cabinet location, and work through the run adjusting each unit to the same reference line. Use assembly jigs to hold panels during build, spacer gauges for drawer fronts, and a drilling jig for handles. This approach reduces the measure-adjust-recheck cycle that slows down multi-unit installations.